
Hello, I've got a very different project to show you today, different because it's a bit removed from my normal style. I was offered this chair to purchase a few weeks ago by a friend of mine who had bought it to do up but hadn't got round to it. I'd need my head read if I said no to this beauty...


I loved the shape of the chair and knew it would look fantastic with a bit of paint on it!
I got to work stripping the old upholstery off...and pulling out the tacks...lots and lots of tacks...

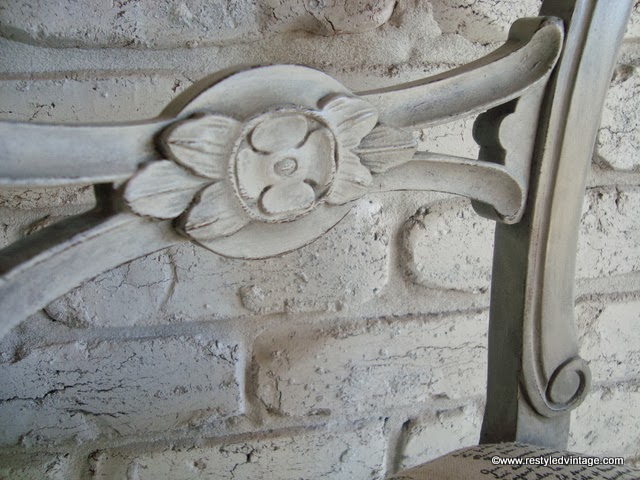
I gave it a sand in a couple of places where the old varnish had been roughly applied and had left drips. Then I gave it a wipe over and painted it with two coats of Annie Sloan Chalk Paint® in French Linen. I then mixed up a 1:1 mix of French Linen and Old White, and roughly painted this over the frame...sort of dry brushed but with a little more paint than you would usually use for dry brushing.
Once it was dry I sanded it all over with a superfine 3M flexible sanding sponge, then clear waxed it.
Onto the upholstery...I had an idea in mind for the chair (stripes) but when I saw this French script fabric brand new in at Spotlight, I knew it would be perfect for this chair and had to have it. It is $24.99/m and I bought one metre, could have got away with 0.7m but I don't mind having leftover fabric to play with (I've got spare fabric widthwise too, not just 30cm in case you were wondering!)

In this photo you can see where I have marked the fabric with a fabric marker, I held the fabric down so I could feel the chair edge then drew along that line, before cutting my fabric there.

I actually haven't ever upholstered a chair like this before...I just made it up as I went along!

I folded all the raw edges under before I stapled - trim will cover this anyway but I wanted it to be as neat as possible. My staple gun is powered by my air compressor - so easy to use, I wouldn't dream of doing this with a manual staple gun...they hurt my hands!


Stapling all finished, ready for the trim...

I bought 2m of trim (just a guess) and applied it all in one piece, starting at the centre back. I had literally a 4cm piece left over (turned out to be a very lucky guess!) I applied the trim with a hot glue gun.


I know this French script thing is a bit overdone already but I like it in the right place, and do think it really suits this chair.


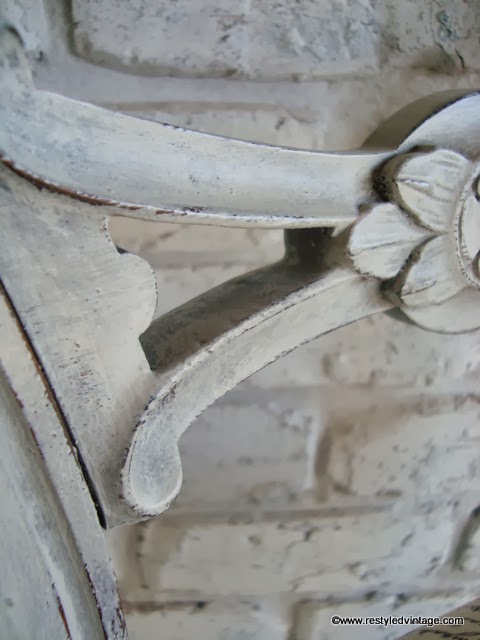
The beautiful detail on this chair really shines now it's not hidden within that dark wood finish it had.


I got the trim to bend nicely around all the curves and corners without too much trouble.


This chair is a one-off and is for sale, please contact karen@restyledvintage.com for details.
Linking up with:


