March 30, 2011

Recent completed projects

Hi there :)

I am as busy as a bee completing client commissions at the moment, and I have one to start on tomorrow that I am very excited about, due to a brave colour choice by my client...woohoo!

Hopefully I will be back tomorrow night to give you a peek of the colour...until then, here is what the piece looks like now:
The seventh drawer is with the set, for some reason just wasn't in the picture my client sent me.

Oooooh I just can't wait to get started on this!

So here are some of the other finished bits that have gone to new homes...
It is a noticeboard, in case anyone is wondering...
little wooden clothespegs are the best thing to hold notes on with.

I whipped up some more of these pillows
and then had a play round and came up with my version of the popular Union Jack theme...
I am in love with it, so it is a keeper...but I can always make more!

I am working on this
and it should be finished tomorrow.

A piece from my stockroom has been selected for custom finishing and I started on it today...here it is in its before state...
Don't worry, it is looking much better already.  Actually, looking at this photo again, I have to admire the client's ability to see past the UGLY that this was!

Well, how was that for an all-over-the-show post?  Welcome to my life...hehehe.

Will be back tomorrow with some progress, I hope!

xx Karen
freckled laundry


March 17, 2011

Before and After - Shabby Chic Chicken Wire Hutch

A couple of months ago I bought this hutch dresser in an online auction and for some reason I cannot for the life of me find my before photo!  I usually save a photo from the online auction but I can't find that either.  So you will just have to imagine this cabinet, dark wood, with glass doors.
Here are the only progress shots I seem to have taken...


I had wanted to put chicken wire in some hutch dresser doors for ages, but hadn't found the right piece before this one came along.  It was a pretty simple process, thanks to the fact the glass was held in by tiny battens that came out easily, and I had just had an air staple gun given to me.  Boy that was fun trying it out!  
Sooo much better than the old hand stapler :)

You may have caught a peep of this dresser in the post about My first ever Market Stall

See?

Here is a closer look...


Well, until today I hadn't had a chance to take some nice photos of the whole thing looking all pretty, so I could list it for sale and do a blog post about it.

So, I will stop talking and show it to you!

I love the shape of the legs!

This cabinet would work well in a kitchen, bathroom, kids room, laundry, living area...anywhere really!

Cushions made recently by me :)
Mmmm the knobs are a little wonky but it all adds character, don't you think?

I soo wish I could have showed you the before photos, but I am sure you will believe me when I say I made it a whole lot cuter!

Sharing with
Furniture Feature Fridays
xx Karen

March 16, 2011

Some more repeat business

As I showed you previously, I turned this
into this.
The client was also after a lowboy and a pair of bedside cabinets to match.
I had this lowboy in stock that suited her...
It actually was part of a set I purchased, the other part was this duchess which I showed you earlier today...
which I turned into this.  
The same client actually custom-ordered the black duchess for her other daughter, so in a way the bedroom suite will stay togther, even though one part of it is off-white and the other part is black :)
Notice the curved front to the drawers?  I think it is lovely.  The original duchess right up the top didn't have this curved front to it, but once the lowboy was painted and distressed the same, the client & I thought they would look great together.  Particularly since the had the same original handles, that we opted to keep.

Here is the part where I should show you the after shot of the lowboy.  I'd love to, I really would.  But the client came to pick it up and it was only after she'd left that I thought 'oh woops, I didn't take a photo of that'.  Woops is right!  Sorry!

Here is where I will try and put that right by showing you the next before and after....the bedsides.
The client looked for ages before finding a suitable set to go with the duchess and lowboy.  Again, they are a little different to the other pieces but luckily they happened to have exactly the same handles as the other two pieces, and all pieces had Queen Anne style cabriole legs.  
(Love those!)
Here they are in the before state...

One of them had quite a bit of sun fading but that wasn't going to matter once they were painted.  And here they are...this was a straightforward project, thankfully!

So now one lucky teenage girl has the shabby chic bedroom furniture of her dreams, I imagine.

Lucky girl!

Sharing with
xx Karen

Before & After - Black Distressed Duchess

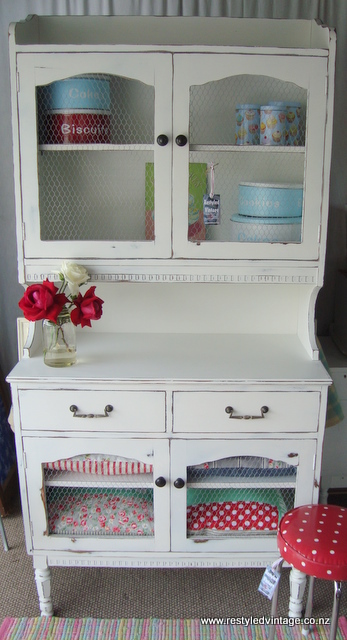
This project was a custom order from a family that have already purchased several finished pieces from me.  The last piece they purchased was this for their daughter.  Their other daughter was also keen on having a similar duchess, but she wanted it to be black, to match a chair she already had.  I was super keen to give that a go, having never painted anything black before!

I had this duchess in stock, which the clients decided would suit them perfectly.

(Sorry about the photo quality, it is the online auction photo and the only 'before'shot that I have.

I got to work removing the hardware, sanding it, filling some holes, then cleaning it before spray priming it with Zinsser BIN.  I thought about the fact that BIN is white and I was painting this duchess black but I didn't bother tinting the BIN because I thought that a little bit of white peeping through once it was distressed would work to my advantage, and give me the look I was after.

I would like to say that this was a straightforward project, but it wasn't.  I assumed it would be quick and easy, as I planned on using my sprayer for the whole project, but quickly found out that black is a very unforgiving colour to work with.  It was a hot day (hot for NZ at least!) when I first sprayed the black on, about 35 degrees.  After giving it a couple of coats, I left it in my backyard while I worked on some other things.  Later that evening I went to put it in my workshop for the night only to find the top and one of the sides had blistered in the heat!  Argh!!!!


Black paint.  35 degrees celcius.  Direct sunlight.

What was I thinking!?

So then when I had calmed down, I sanded it all back, re-primed and repainted it.  


So far, so good, but then we had another earthquake on February 22nd and even though I was lucky enough to not be directly affected, I still couldn't put my mind to painting.  So it sat in my workshop, safe and well, till we had another really hot day, and the late afternoon sun shone in the open door and...you guessed it...once again blistered one end of the duchess :(

So while I wasn't happy, worse had happened and was still happening in my home town due to the eartqhuake, so I just sucked it up and sanded it back, again, and primed and painted it, again.

I ended up doing the last couple of coats with a brush, as while I love my sprayer, I just wasn't getting the finish I was after....the sprayed finish made it look to 'factory' and new for my liking (hope the client agrees!)

Once I had finished the painting, I distressed it using a sanding sponge and 180 and 220 grit sandpaper.  I also learnt that black isn't very forgiving when you touch sandpaper onto it.  It doesn't stay black and every scratch you make with the sandpaper sticks out like a sore thumb.
 
So to finish I brushed on two coats of water based poly, which gave it a lovely finish and made the sandpaper scratches disappear, and best of all, took the colour back to black.
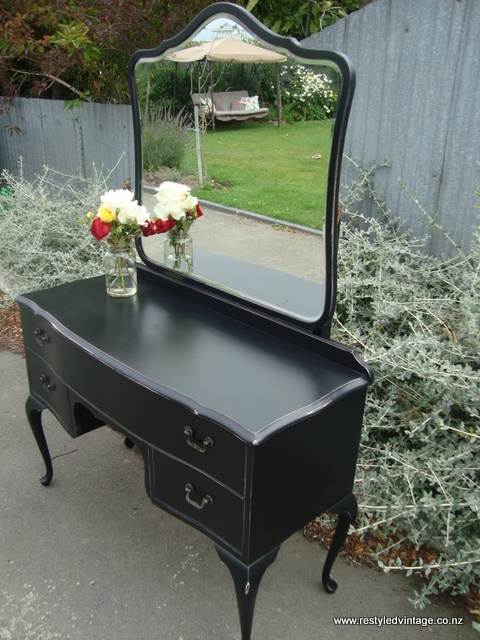
Here it is...

It is a hard job taking a nice photo when there is a mirror involved (especially when photography is not my strong point!)...that is my front door step :)

The white peeping through for the BIN is very subtle, but I think it looks great.


As stressful as it is at the time, I do enjoy these projects that challenge me...I always learn things that will help me with future projects, and gain more experience along the way!
 and
Furniture Feature Fridays
I have more finished projects to share...will be back soon :)

xx Karen