September 1, 2015

Renovating a Classic Caravan - The Story of Blossom - Part One

As many of you will know, I've recently finished a major renovation/rebuild of a classic caravan that we named Blossom.

I always thought that once I had finished, I'd go back and write about my project, and now it's time.

So...here's Part One: Background and The Purchase...let's go!

I've been fascinated with caravans for a long time, and was super excited in late 2007 to become the owner of one that I cosmetically renovated inside. You can read about that project here.

We sold that van when we decided to move to Australia in 2011, and I missed it dreadfully and dreamt about buying another one and doing it again. Early last year I started looking for one to buy, but in my price range (under $3000) there wasn't much about, and what there was, was snapped up very quickly.

One night in April 2014 I found a great van for sale on Gumtree - it was a 1970's Millard, it was priced around $3k and was located in Tamworth, about three hours' drive of where we live. I showed my husband and he thought it looked good too (it would be fair to say that the caravan was my dream, not his, but I'm lucky that he's very supportive and me and all my ideas!) We agreed that it was worth a look, so I called and made arrangements to look at the weekend (a couple of days later).

I went to sleep that night very excited, dreaming of all the possibilities of what I could turn this dark, dingy van into...

Sadly, the following day the seller called and said a local couple had just viewed and bought the caravan. I was worried that might happen, and it did....back to the drawing board I thought...but the seller, knowing where I lived, asked me if I was aware that there was an old guy selling caravans in a town nearer to me. I said I wasn't aware, but the funny thing was, I was actually in that town when I got that phone call. The Tamworth guy told me how to find the this guy, so I went straight round to his house to see if he happened to be there, and what (if anything) he had for sale.

He was there and had a few old vans in various stages of being 'done up'. I use that term loosely because his idea of 'done up' and mine was quite obviously very different. More on that later.

Anyway...I had a look through his vans and quickly discounted one that had had the dinette seating and kitchen cabinets removed. That looked like WAY too much work for me and I didn't have a clue how to build cabinets.

I discounted another one (actually a Millard) because the original layout had been mucked with, and I decided I really didn't like all the small paned windows.

The van I liked the look and feel of the best, due to its nice big windows, cool retro shape and great simple layout, was this one.
She's a 1978 Viscount Supreme, originally sporting a white exterior with a blue stripe. Hard to see in the photos but she still had her original Viscount sticker on the front and rear, along with a five-digit phone number for the dealer on the Central Coast where she must have been sold from at some stage.

I liked her, I really liked her, and I was excited! I think I might have found MY caravan! I made a phone call to my husband who was pretty surprised about developments - firstly I told him the other van had sold but then I went round to some random guy's house and now I wanted to buy a caravan from him. 

Yeah I know, he puts up with a lot...lol!

Bless him, he said to me that if I thought it was OK, then just buy it. Truth be told, he was probably sick of hearing about it...haha!

I was actually kind of sick of looking and feeling like I was always missing out, and really just wanted to get stuck into a project...so the deal was done...she was going to be mine for $2300 which included a Blue Slip (mechanical safety check required for Registration - like a NZ Warrant of Fitness).

Now I mentioned earlier that this fellow 'did up' his vans - basically he was a high turnover flipper - he bought old vans off people, very quickly 'did them up' which in hindsight is code for 'hide the leaks' then resold them. I want to add that I'm not mad at him, and never have been. I don't regret buying a van from him. Instead, it was really my fault. Buyer beware and all. I was super excited and totally had my rose tinted glasses on. Plus, I didn't really know what to look for. I felt some security in knowing that the van passed a Blue Slip inspection which should mean that the mechanics of it were safe, at least.

As part of his 'doing up' process, he did an exterior paint job on his vans. The one I'd chosen to purchase was next on the lineup to get a new paint job, and since I'd seen it prior to painting, I asked if I could choose the colours, to which he agreed. I had actually first asked if I could buy it without a new paint job, but he wouldn't reduce the price so I figured I may as well let him paint it 
(which turned out to be a big mistake...)

I went to the local automotive paint shop with him, and chose mint green and pastel pink, which he bought there and then. I paid my deposit and made arrangements to come back about ten days later and pick up the van, which would have been painted by then.

Those ten days dragged as I pored over the photos I'd taken, and dreamt of what I would do to it once it was mine. My basic plan was to give it a decent clean, a fresh new interior paint job, make new curtains, upholstery and call it done. 

Oh how wrong I was....

...to be continued...

August 27, 2015

Introducing Blossom the Classic Caravan

I have a BIG announcement to make!

After seventeen months of long, hard, dirty work, the biggest ever Restyled Vintage transformation is ready to show off!


Before I introduce you to her properly, I have one more announcement to make. The focus of Restyled Vintage is changing. I'll no longer be painting furniture as my main focus - it just doesn't really excite, inspire or challenge me any more. In the future though, you never know - I may do a little bit from time to time, if I feel inspired to do so...never say never!

Restyled Vintage will continue, of course! It'll be a real mix of everything I love - Vintage, Vintage Style, vintage caravans and anything and everything Old School Cool.

Now....drumroll please....

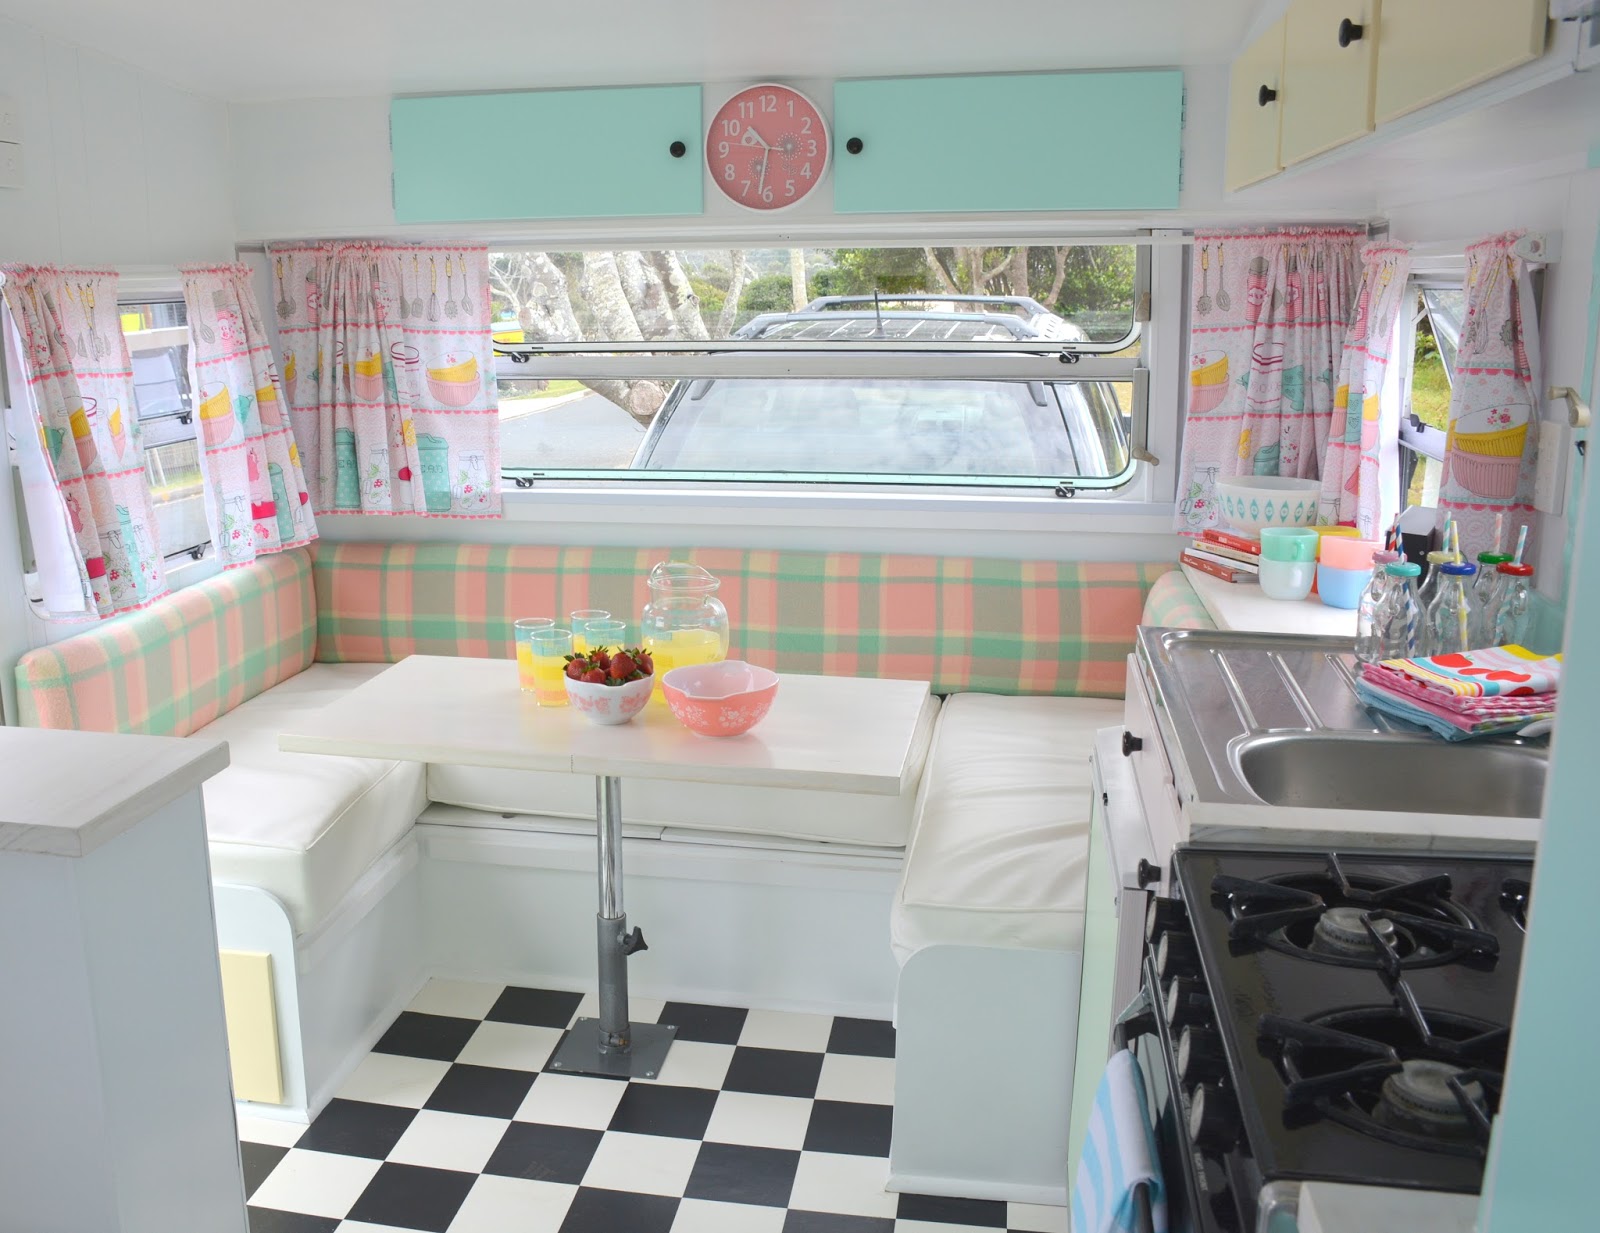
This is Blossom. 

She's an aluminium framed Viscount Supreme, built in Australia in 1978.

She is 16 feet long x 8 feet wide, and sleeps four people - she has a full Queen bed at the rear, and the front club lounge shaped dinette seating converts to a small double.


She has a fridge which runs on 240v electricity, and a gas oven and cooktop. Her original wardrobe has been converted to a pantry with lots of storage space - in fact, the whole caravan has an amazing amount of storage.


Blossom's cupboards are stocked with carefully selected vintage and vintage-style treasures to complement her charm - vintage Pyrex, Melmac picnic ware, vintage Tupperware, vintage linens, and vintage enamel cookware all mix beautifully with pastel canisters and kitchen utensils.

She's vintage pastel heaven!


Blossom's brand new Queen size bed is very cosy and comfy, and there's also plenty of storage space underneath.


February 2016 Update:
Blossom the Classic Caravan went to live with a new family on Valentines Day, 14th February 2016.

There will definitely be another caravan renovation in store for me, maybe more than one...watch this space!


August 3, 2014

French Blue Buffalo Check Wicker Couch

Latest project just finished:

 I've given this lovely wicker couch a fresh new French country style look with new cushions in French blue buffalo check cotton. 
The seat cushions are the originals recovered and the back cushions are brand new inserts - the original back cushions were a funny shape and I don't think they suited the piece at all. Four loose cushions look much better and are more comfortable than what was there before. The fabric is 100% cotton, and the covers are all removable for washing. The back cushions have envelope openings and the seat cushions have ties. All the seams are overlocked. 
This would be perfect on a covered porch or verandah, in a sunroom or conservatory, maybe even a bay window in a large bedroom.

Couch measures 1500mm wide (armrest to armrest) and is for sale. Price is $225, please contact me with any queries, or if you'd like to view or purchase it.


French Blue with white and natural cane is such a fresh, pretty and classic combination I think.

Here's what was on it before...

Much better now...do you agree?

May 7, 2014

How to get a Great Waxed Finish on Graphite Annie Sloan Chalk Painted Furniture

Last week I finished this huge Hamptons Style Buffet and Hutch in Graphite and Pure White Chalk Paints by Annie Sloan, and today I am giving away some of my tips on how to get a great finish on your painted furniture.
I got a lot of nice comments about this piece, one of my favourites was from my parents who said they think this is their favourite piece I have ever done. I love it too, and it hasn't sold yet, which I'm not sad about at all...in fact I am currently plotting how to get my husband to help me carry it upstairs to the spot I have for it. I might have a bit of a furniture juggle while he is at work today and leave an empty space where he normally plonks down his wallet and keys...

Anyway, I was asked, and am asked quite often, how I get such a nice smooth and even sheen on my waxed finishes.


I'd say it is a combination of things, and a lot of them have nothing to do with the actual waxing process - good surface preparation, painting with a good quality brush, the paint being the right viscosity, the weather temperature, and sanding in between coats. The reason for this is that your waxed finish is only going to be as good as the paint finish you've applied first. If that is good, and smooth, that is half your battle. I've mentioned previously, my favourite sanding product is 3M Sanding Sponges. I hardly ever use actual sandpaper in my painting and finishing process.

I mostly use Annie Sloan wax in Clear to seal my painted furniture. I apply it with either a round natural bristled brush, or a clean lint free rag. Lint free is hugely important, you don't want bits of fluff stuck in your waxed finish (learnt the hard way!) I apply my wax in small (approx dinner plate sized) sections then wipe off the excess (which shouldn't be much, you don't want big gobs of it all over your piece, it's just a waste of wax). I use another clean lint free cloth to wipe off, and  I quite firmly, in fact I am almost buffing my piece at this point. Not to a super shine, but just until I feel no resistance from the cloth, and the furniture feels dry and smooth to touch, not sticky or 'draggy' (totally not a word lol) at all. If you've done this you will know what I mean. Just-waxed furniture with too much wax on it feels awful. If it feels like that you need to keep rubbing with a clean part of your cloth.

That is the process I use for all my painted furniture...except when I've used the colour Graphite. I've only tried this beautiful colour recently and had heard that it was very hard to wax evenly and get a nice sheen to it. I had even been advised by a Sydney retailer of Annie Sloan Chalk Paint to use Dark Wax straight on the piece, without using clear first. I had seen a piece in their shop that they'd done like this and it did look nice, but definitely took on a brown tone which I wouldn't want for all Graphite pieces.

I initially painted a couple of small projects with Graphite - a couple of lamp bases.
They turned out very nicely, and were easy to wax because they were so small, with no horizontal surfaces (it is the horizontal surfaces that tend to show up patchy wax jobs). But I did notice that the Annie Sloan Wax changed the colour of the paint, it lightened it and the wax almost gave a whitish tinge over the Graphite. Again it looked ok on the lamp bases but I certainly didn't love it for a large piece of furniture. I decided that the answer to getting the finish I was after for this Hamptons Style Cabinet was to use a different wax, more of an 'oilier' style wax, like a beeswax.
Several months ago I had been sent a sample of a scented beeswax by Monique of Dandelion Wood in Victoria. The brand is L'Essential and it smells absolutely divine. Seriously I could eat it (well not really but it is lovely). Apparently it is food safe though...
I decided to try this wax on a small section of the buffet and hutch, and loved it. The wax went on beautifully and didn't leave a whitish sheen like the AS wax. I used a cloth rather than my brush to apply the wax, and found rubbing it in was quite a workout, but well worth it for the end result. The rub in-rub off process I used to apply it was the same, except this wax won't feel as 'dry' straight away. You do need to be careful while it is drying not to get finger marks on your piece as with Graphite, they do tend to show up. 
This wax gave me the exact finish and colour I was after for this piece, and it will continue to be my wax of choice for Graphite pieces. I may even try it on other colours to see what difference it makes. A week after painting this piece, I can still smell the beautiful perfume of the L'essentials wax on it...so nice!
Another option would be to use a polyurethane sealer instead of wax - my poly of choice is Porter's Clearcote which is water based, doesn't yellow, and is suitable for interior or exterior projects.

I hope this has been helpful to you...if you haven't tried Graphite because you've been worried about the waxing step - don't be - if you follow my tips you will be fine!

Disclaimer:
I was given the L'Essentials wax to try but was under no obligation to write about it. Any other products mentioned and recommended by me are just because I like the products - the makers have no clue I have mentioned them. Links in this post are not affiliate links.

And the Winner is...

Thanks to all that read and commented on my post reviewing Vintage Caravan Style.


The winner of a copy of the book is Robyn Nixon of Grafton. Congratulations Robyn, please email me your postal address so I can organise your book to be sent.

April 30, 2014

Hamptons Style Buffet and Hutch

I've just finished this large two piece solid pine buffet and hutch, and I absolutely love it!
It is a bit of a departure from my normal pastel retro cute style, but I was inspired to do this in a more classic Hamptons style after our recent trip to the NSW South Coast and Southern Highlands - Bowral in particular has some stunning shops and a fantastic antiques emporium called Dirty Jane's.

Here's how it started out...

I gave it three coats of Graphite Annie Sloan Chalk Paint, and the inside of hutch got five coats of Pure White. I've sealed it all over with clear wax.  In another departure from my usual finishing techniques I didn't distress this piece - well I did a tiny little bit on the white but none at all on the black.  I thought that the combination of the colour and the shape of this piece made quite a statement and any more going on would have just been too much.  Plus the Hamptons look I was going for is classic and understated, not OTT!


This piece is available for sale, $650. It measures 1100mm wide x 550mm deep x 2000mm high.
Pickup is from Lake Cathie NSW 2445.
For any queries or to view please contact karen@restyledvintage.com.

Sharing at www.savvysouthernstyle.net